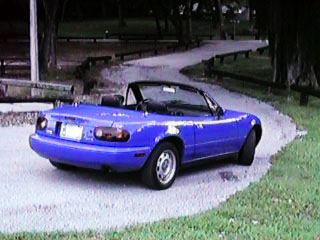
 Your mission
, should you choose to accept, is to
install a set of 4 braided stainless steel brake lines, and
carbon-metallic brake pads, on a Mazda Miata, in Miami during
the time window between the morning dew and the afternoon
thundershowers.
The fine print:
Disclaimer: any and all techniques described herein are simply what I
did to my 91 Base model Miata. They are not a recommendation that you
do the same, a claim that this is the "right way", or any other such
thing, just a record of what I did. I accept no liability for any
use of this information, your mileage may vary.
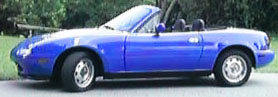
Your mission
, should you choose to accept, is to
install a set of 4 braided stainless steel brake lines, and
carbon-metallic brake pads, on a Mazda Miata, in Miami during
the time window between the morning dew and the afternoon
thundershowers.
The fine print:
Disclaimer: any and all techniques described herein are simply what I
did to my 91 Base model Miata. They are not a recommendation that you
do the same, a claim that this is the "right way", or any other such
thing, just a record of what I did. I accept no liability for any
use of this information, your mileage may vary.Another brake job writeup, with pictures is on
Hard parts ordered from The Dealer Alternative Ate "Super Blue Racing" brake fluid ordered from Imparts (800)325-9043. Brake lines from Jackson Racing - delayed 1 week getting to Bill, another week getting to me. I ultimately ended up doing the install on Labor Day, so "Tech support" (Bill, at 1-970-464-0878) was unavailable, hey, no biggie, I used to be able to change the front brake pads on my 1980 Honda Civic in 1/2 hour flat, including lifting the car a with scissors jack, how tough could this be???
Start time: 8:00 A.M., the pavement is dry, sky is blue, what could go wrong?
Lifting the car wasn't too bad, though I would have liked some reassurance that I was doing it "right." The Chilton's manual is no help at all, giving a generalized statement about side members and trailing axle front mounting crossmembers. What I did was: pick a flat spot in the road where a tree would be providing shade from about 9 until Noon, park about 36" from the curb (this is a 60' wide street that gets very little traffic.) Loosen all 16 lug nuts, then jack up the curb side (which is lower due to the crown in the road.)
First, I lifted using the dimpled spots marked for use with the scissors jack, then discovered that the jackstand couldn't get anywhere close to that spot. So, I lowered the car & moved the jack to where the jackstand was, lifted again & put the jackstand under the forward-most notch. This was repeated at all four corners, giving the curb-side jackstands two notches of "extra lift" while the stands in the center of the road were at the lowest setting. Maybe three notches would have leveled the car better, in any event, the crown in the road didn't cause any problems. Now, I didn't notice any body-flex, creaks, groans, stress cracks, crushed metal, or other signs of a poor choice of lifting points, so I guess I did O.K.
After the fact, I found some excellent lifting advice on
![]() , including
front and rear central lifting points.
, including
front and rear central lifting points.
Removing the wheels was as simple as it should be (remember, I loosened the nuts while the car was on the ground), the jackstands made a nice place to put the lug nuts, and I kept the wheels beside the stands.
Brake lines first - there's an instruction sheet from Jackson Racing, they say to start at the right rear - I do, the stock brake block comes off and is replaced with one that is supplied. This sounds difficult, but actually isn't nearly as bad as the next wheel.... The 10mm wrench loosens the fittings and the brake block, the 12mm wrench removes the "banjo bolt" that connects the brake line to the wheel cylinder. Jackson says to keep the stock washers, I do, they're copper, I thought copper washers were "compression" washers that should be used once and discarded (like the one on the oil-drain plug), $145 for brake lines, one would think 8 tiny copper washers shouldn't be too hard to come by...? Anyway, everything just bolted on and off as described.
This would also be a good place to mention that the rear lines are shorter than the front ones, at least, I hope they are, two different sizes were supplied, no mention of this in the instructions, I put the short ones on the rear, sounds logical, and they seem to fit O.K. I noticed the steel lines were a bit longer all around than the stock rubber lines, they don't quite interfere with the suspension, but they're close. Care needs to be taken not to twist them up making a spiral when attaching the banjo bolt, as little as 1/2 revolution makes a big difference in the way the lines "sit."
On to the brake pads, should be simple, remember the Honda?
This ain't no Honda. On the Honda, I could just remove the top mounting bolt, loosen the lower one and swing the caliper out to change the pads. The Miata has metal plates behind the discs (on the front they look like air-scoops, but there are similar non-scooped ones on the back). These plates seem to mandate removing the caliper assembly in order to replace the pads. The other Miata brake job page indicates that you should be able to remove one bolt and swing the calipers up to change the pads. They also have a photo showing which bolt to remove. Live and learn.
Starting on the right front, there are 2 14mm bolts that hold the assembly on (not to be confused with the bolts that are _in_ the assembly), and they are on TIGHT! The breaker bar (just a 12" long handle made of a flexible metal, like a ratchet drive without the ratchet) did wonders on those bolts. Now, the assembly is out, compress the piston (two long wrenches inbetween the pads & pry the pads apart to compress the piston.) Then, the old pads more or less fall out and there are springs & clips everywhere, oops.
After much frustration, I discover that the four tenatious clips (the ones that didn't fall out on their own), should stay in-place, the piston side pad should go in first with the two springs in it, then slide the other pad into place, inserting the springs into the pad as it is moved into place. The little goober clip can go in last, reference the other front wheel for placement. This took a serious amount of time (like maybe an hour or more) to do the first front wheel. The second front wheel took less than 10 minutes.
Finally, I decided to remove the "mystery bolt" (14mm) on the back of the assembly beside the one that attaches the parking brake stuff. Under here (in addition to yet another copper washer) is a allen screw that "adjusts" the cylinder, allowing you to compress it so the new pads fit in. This was an important discovery. Now, slide the cylinder side pad in first, flip it up into place, then shift the assembly so that the outer pad can be shoved in caddy-corner, one corner "in place, the other corner slipping in through the barely big enough opening by that damn spring clip. After doing this, re-mount the assembly on the vehicle and "adjust" the brakes into contact with the rotors; the adjustment works like a normal screw, clockwise (as viewed from the top of the allen screw) tightens the brakes.
I have read in some document on the Internet that the Miata brakes are not self adjusting, and one must twist on this allen screw to adjust them. Personally, I never did a damn thing to these screws, and my brakes adjusted themseves just fine over 50Kmi until the pads were nearly gone. Also, the rear pads were just as worn out as the fronts, so I think the self adjustment is working fine. That same net-wisdom says to adjust the screw until the brakes barely drag, then back off 1/4 to 1/3 turn. My rotors wobble around enough that I can't tell when the brakes "barely drag", so I twisted until the pads were tight, then backed off 1/2 turn, which allowed free turning. I suspect the self adjuster will take care of it from here...
By the way, that little gizmo can fall out if you turn the assembly upside down (voice of experience), just drop it back into place, but try to get all the road-grit off first :). A preventative measure would be to re-install the mystery bolt when not actively adjusting the allen screw. Judging by the shape of this gizmo, I'd say there's some sort of ratchet device in there that adjusts the brakes to maintain uniform pedal height as the pads (front and rear, both on the same hydraulic circut) wear down. Don't forget to re-install the separator spring, this can be done easily after the assembly is re-mounted to the car.
In the meantime, I call a local dealer (Ocean Mazda), and over the phone they say they can give me a spring, without the whole brake pad kit. I drive there on my lunch hour, in the un-airconditioned truck, only to be ignored by the two guys behind the parts counter for 20 minutes after I get there (they did say they'd be with me in a minute...) I tell them about my phone conversation, they deny all knowledge but call up Tito from the back - Tito at least feels compelled to talk to me, though he denies being the person on the phone also (I tried 3 times to get the name of the person on the phone, but they were thoroughly unintelligible when it came to spelling - not uncommon in certain parts of Miami.) Tito informs me that the part only comes in the brake pad kit - $59.95, but they'll cut me a deal $48 something... Did I mention that I have good reason to hate every Miami area Mazda dealer I've ever had contact with? Anyway, I leave there without buying anything, and when I get home, there's the spring clip in my shirt pocket. Duh! Tommy (from Roebuck Mazda) e-mailed me back, yes he has a spring clip he can send me - thank God there are some decent human beings left in Mazda of North America.
To complete the saga - I jack the car, pull the wheel & replace the clip - doing a visual inspection while I'm in there - hmm, the bootie has been partially blown off the purge valve - not good, get the 8mm wrench & tighten it. I inspect the other 3 wheels. I attempt a visual with a mirror, I can get the angle, but the light is terrible - instead, I find the brake line by touch, then trace it back to the caliper area & feel around for the purge nipple. The other three are in-place and dry. I guess the mechanic (me) just did a really bad job on the left-rear wheel. Might have been those dark clouds rolling in... Anyway, I think it's fixed now, hopefully the fluid only leaked out under pressure & didn't suck in any air on release (the valve was fairly tight...) The pedal doesn't feel spongy...
This part went smoothly enough. Cut the silicone tubing squarely so it makes a good fit over the purge nipples. Each wheel cylinder has a purge nipple, hopefully covered by a rubber bootie. Remove the bootie, loosen the 8mm nut, let some brake fluid bleed onto the threads, install the tubing (other end goes to the catch pan) and start pumping the brake pedal until the new fluid starts going into the catch pan. Remember to fill the resevoir as needed, and also remember that this stuff eats paint. I didn't bleed fluid onto the threads of one of the nipples, and I noticed air bubbles appearing in the (clear for a reason) tube. Letting some fluid fall on the threads plugged the leak. When you're satisfied that all the old fluid and air is out of the system, tighten the nut and remove the tube. Now (if you're using a socket like me) snug down the nut and replace the bootie - what could go wrong? After the nipples were snugged, my brake pedal had its normal "feel" back, not too squishy or falling to the floor. Either of these conditions would indicate returning to step 1 and purging the lines again until the pedal "feels right."
I used Ate Super Blue Racing brake fluid (DOT 4 - non silicone - Dry BP 280C, 50C above DOT 4, Wet boiling point 200C, 45C above DOT 4). This was $24 for 2 1-litre cans from Imparts. I bought 2 cans, one blue, one amber, so next year when I purge the system, I can use the amber and see when it gets to the wheel cylinders. The amber fluid has the exact same characteristics as the blue, except of course the color. Imparts is also a decent source for other hard to get ahold of liquids (Redline, etc.), and they have a flat $3.50 shipping charge. (No, I don't have any connection with the company, but I was impressed with their service.)
I did finally notice the higher pedal effort when cold phenomenon that Bill describes for the Carbon Metallic pads - after 15 minutes of no-brake freeway driving, I came to a sudden stop, the brakes were a bit slippery for a second, but higher pedal effort overcame it. In my typical around town driving, I very rarely encounter any "high pedal effort" requirements. This could be partly due to the ambient temprature in Miami (about 90), keeping the pads a little pre-heated.
All told, this job took just over 7 hours, including the break in drive - and I got it done well before the rain started. Then there was the spring clip fiasco, but at least that ended well, reinspecting the purge nipples a day or two after the job sounds like a good idea anyway, just like re-tightening the wheel lugs after 100mi or so of driving.
Update: September 17, the brakes are "getting in tune" now. I notice much lower pedal efforts than before, stopping with easy pedal pressure in situations where I used to have to "stand on it" before. This makes high-G braking maneuvers much smoother and better controlled. Let me emphasize that lower pedal effort does not mean reduced "feel", the brakes have as much tactile feedback as before. Also, they are dead silent, no squeaks, grinds or hisses (on stock, undrilled rotors). I didn't purge the system again, and I'm pretty convinced it doesn't need it. It's hard to say whether the pads or the lines are responsible for the improvement, but taken as a whole, I'm very happy with the results.